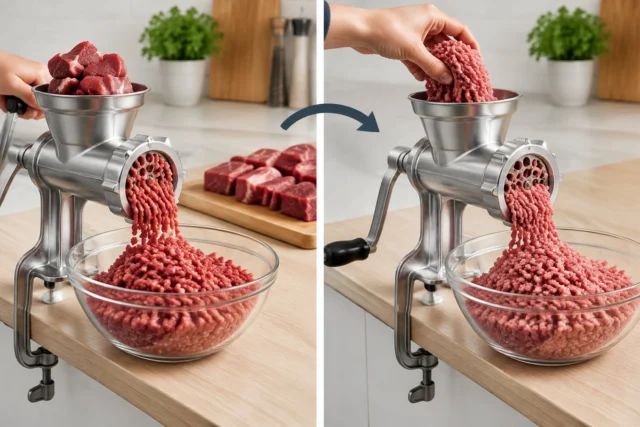

To clean a meat grinder, follow six steps. Unplug it and clear loose meat. Take apart the hopper, auger, blade and plate. Scrub and rinse every food-contact part in hot, soapy water.
Sanitize per the product label and hand-dry the plate holes and threads right away. Thorough meat grinder cleaning preserves food safety and keeps rust from ruining parts.
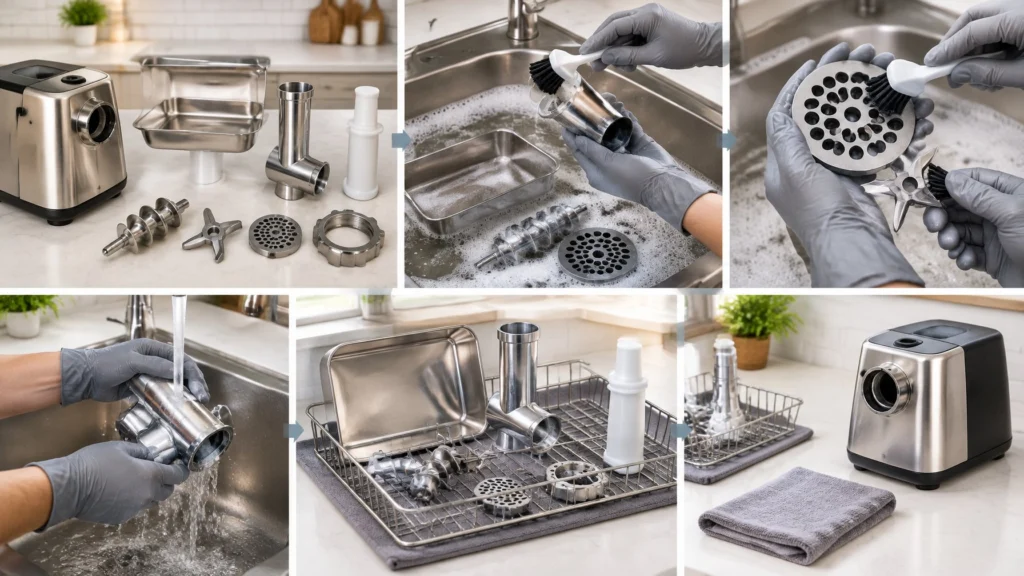
After reading, you will know how to clean a meat grinder fast after a deer or bulk beef session and stop flash rust before it starts. Successfully cleaning a meat grinder also means knowing which parts should never touch water.
The guide splits washing from sanitizing, gives label-based sanitizer numbers, and covers the fixes owners ask about most: packed plate holes, lingering smell and stuck plates.
Grinder Head Cleaning Complaints: Cast Aluminum vs. Stainless
Bottom line: The most common owner complaint is about aluminum heads. They turn dull gray or black and leave a gray residue after dishwasher cleaning. Stainless complaints focus on trapped residue and rust on carbon steel plates and knives, not the head itself.
| Issue | Cast aluminum heads | Stainless heads |
|---|---|---|
| Dishwasher damage | Very common. Parts come out dull gray with a chalky film. | Rare. They are generally dishwasher-tolerant, though the plates and knives may not be. |
| Gray or black residue on meat | Frequently reported. Oxidized aluminum rubs off into the grind. | Not typically reported. |
| Restoring the finish | Described as tedious. The film is “a nightmare to clean.” | Usually unnecessary. |
| Residue in nooks and threads | Common complaint | Common complaint |
| Weight and handling while washing | Lighter and easier to handle | Heavier, which makes large sizes awkward in a sink |
| Rust | No, but it corrodes and oxidizes | The head resists rust. Paired carbon steel plates and knives can rust. |
What Owners and Makers Report About Head Cleaning
- Dishwasher discoloration is the classic aluminum complaint. One owner ran the grinder parts on a high-temperature dishwasher cycle. They came out “a really dull gray colour” instead of shiny, and the owner had assumed the parts were stainless. (Reddit r/AskCulinary)
- Gray residue in the meat usually points to aluminum. One owner said aluminum “will oxidize and turn a dark grey/black,” while steel cutters and dies rust but don’t oxidize that way. They described the gray film left after a dishwasher run as “a nightmare to clean.” (BBQ Brethren)
- Owners of both types worry about nooks, crannies, and plastic parts. Owners debate whether soap and water is enough or whether to add a bleach or sanitizer rinse. One raised concern about the plastic piece inside the neck. (Rokslide)
- Material choice affects lifespan and buyer satisfaction. Manufacturers weigh aluminum’s lower cost and weight against stainless’s durability. (Alibaba Seller Blog)
- Standard guidance applies to both: disassemble, remove residue, wash in hot soapy water, sanitize, and dry fully. (Mirabake)
Practical Tips for Aluminum and Stainless Heads
- Hand wash aluminum only. Dishwasher detergents are alkaline and attack the aluminum’s surface.
- Fixing oxidized aluminum: owners commonly report success with Bar Keepers Friend, a vinegar or citric acid soak, or a polish such as Flitz. Afterward, wipe the parts with food-grade mineral oil.
- Grind a few slices of bread at the end to push out meat residue before disassembly. Owners of both head types mention this tip.
- Freeze the head before grinding. This reduces fat smearing, which makes cleanup easier on either material.
What You Need Before You Start
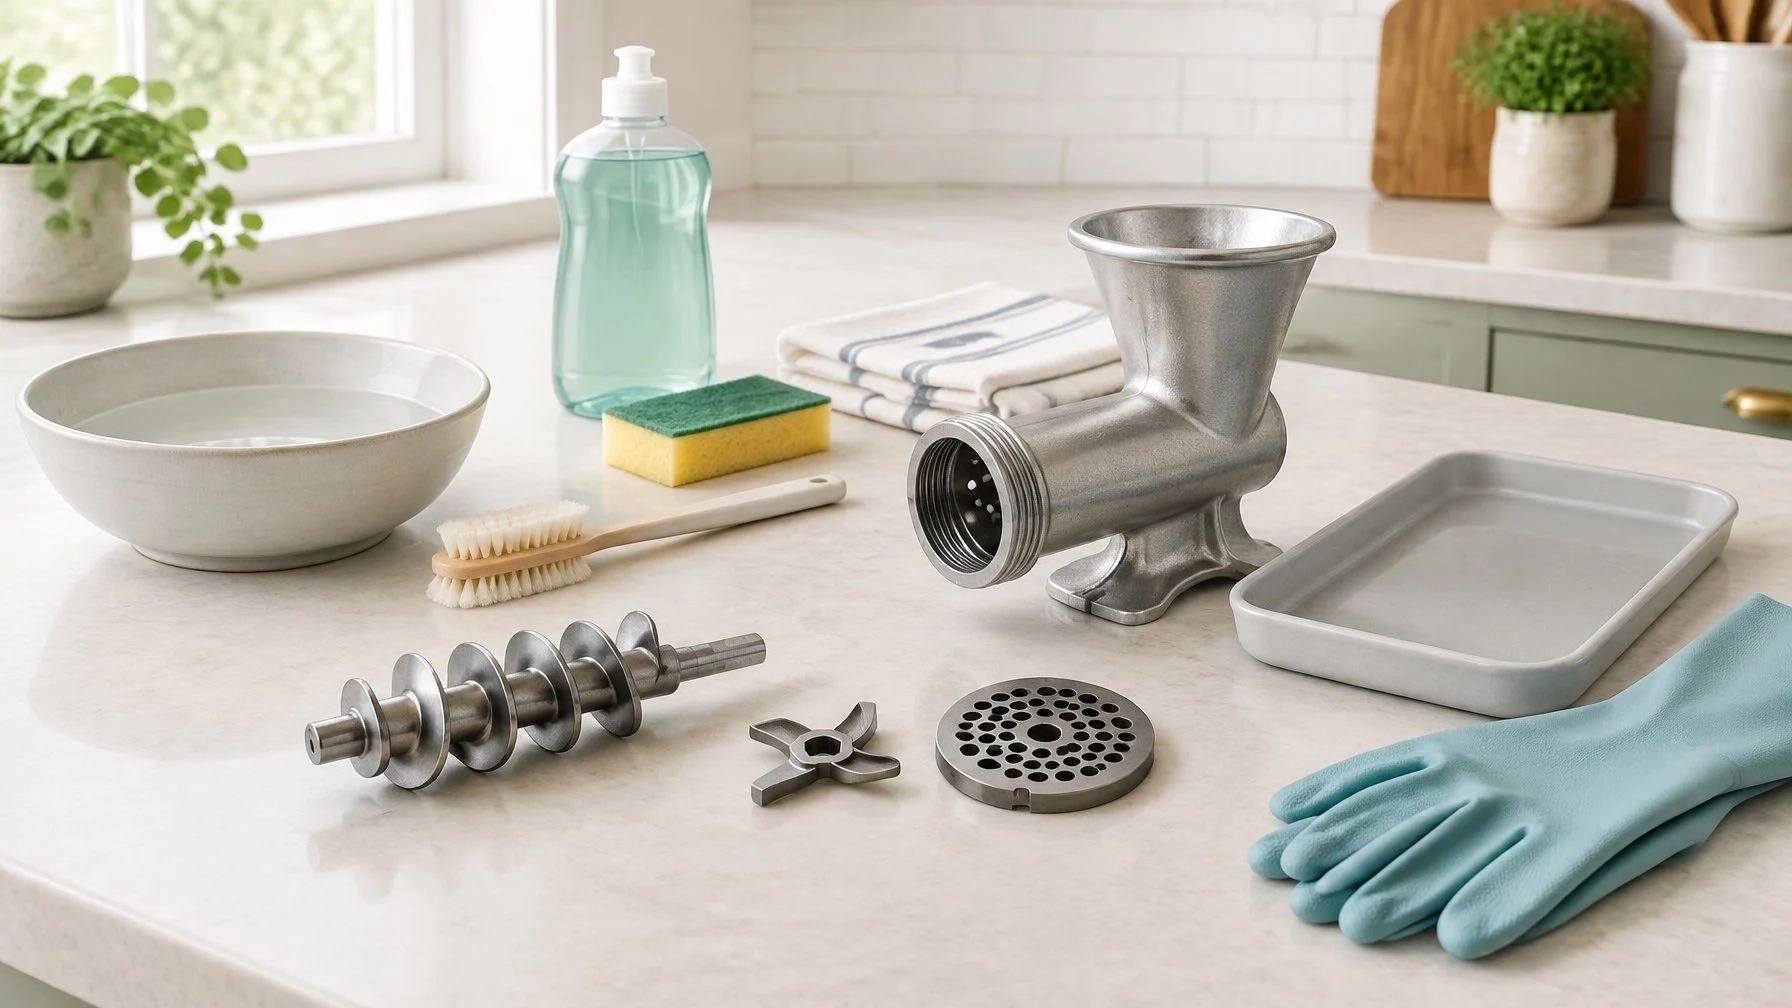
Learning how to clean a meat grinder does not require fancy tools. Cleaning a meat grinder simply requires basic supplies for the meat grinder parts that touch meat, plus a clear rule for which parts stay out of the sink.
Cleaning Supplies for Food-Contact Parts
Set these out before you start. Fat sets up fast once the head cools.
- Mild dish soap and hot water. Hot, soapy water lifts fat. Cold water smears it.
- A soft brush and a small bottle brush. The soft brush scrubs the auger. The bottle brush reaches inside the head and the threads.
- A toothpick or plate-hole brush. Use it to push out meat packed in the grinding plate.
- A food-safe sanitizer. Pick one labeled for food-contact surfaces, or use unscented household bleach.
- Cut-resistant gloves. The grinder blade is sharp on four edges, and soapy steel is slippery.
- Clean, lint-free towels. You hand-dry every part.
- Food-grade silicone spray or food-grade mineral oil. Use whichever your manual allows.
In 25 years of commercial kitchens, the parts that failed early were the ones put away damp. A towel costs less than a new plate.
What Should Stay Out of the Sink?
The motor housing, power cord and switch never go in water. Water in the motor can short it or rust the gears. It also creates a shock risk the next time you plug in. Wipe the housing with a damp, soapy cloth, then a clean damp cloth, then a dry one.
Regular meat grinder maintenance includes knowing what never goes in the wash. Check your manual before you soak parts or use a dishwasher, as many cast aluminum and tinned parts discolor or rust.
| Part | Wash in sink? | Dishwasher? | How to clean |
| Motor housing and cord | No | No | Damp cloth, then dry |
| Hopper / meat pan | Yes | Check manual | Hot soapy water |
| Grinder head | Yes | Check manual | Bottle brush |
| Auger | Yes | Check manual | Soft brush |
| Knife and plates | Yes | No (most brands) | Brush, dry at once |
Wash and Sanitize the Grinder: Steps 1–4
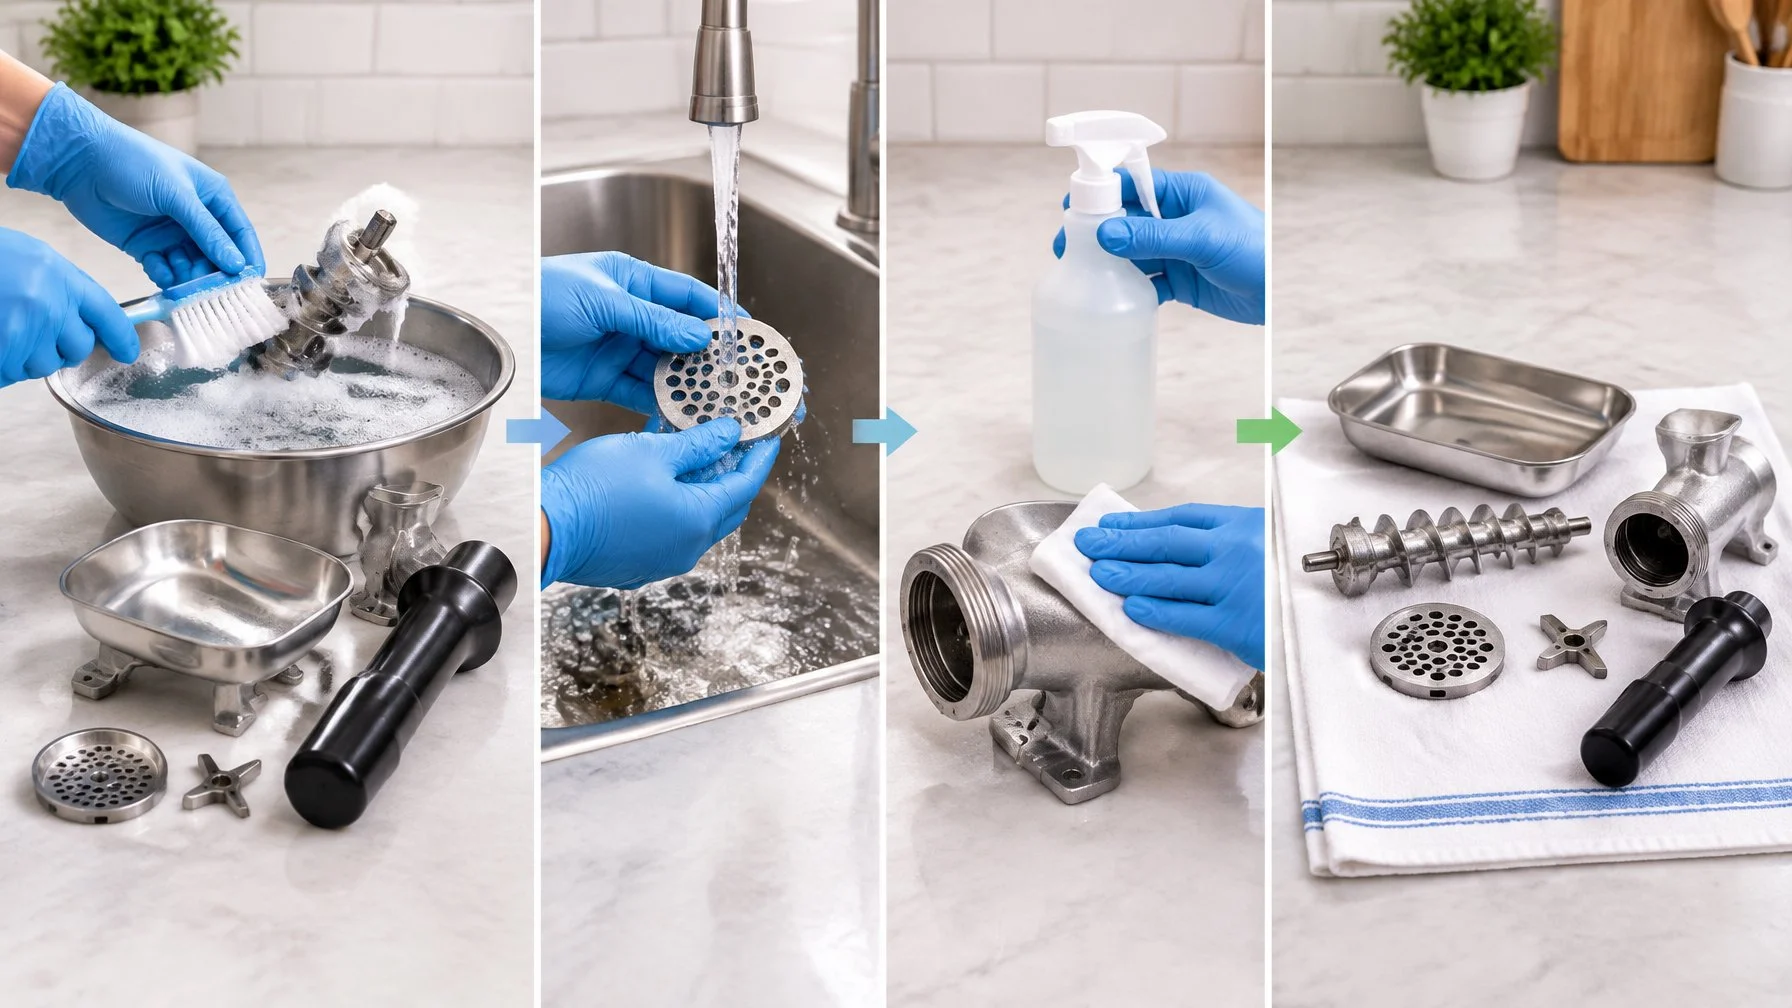
The first four steps of meat grinder cleaning cover powering down, taking the head apart, scrubbing every food-contact surface, and sanitizing by the label. Do them in order, because sanitizer does not work well on dirty steel.
Washing and sanitizing are two different jobs. Washing removes fat, meat and visible soil; sanitizing then reduces bacteria on a clean surface to a safe level. You need both on any part that touched raw meat.
Step 1: Unplug the Grinder and Remove Loose Meat
Turn the switch off and pull the plug. Before cleaning a meat grinder, always disconnect the power, as a machine that starts while your hand is near the knife can cause a serious cut.
Then remove the meat pan and stomper. Scrape loose meat out of the hopper and throat with a spatula. Some manuals suggest running a slice of bread through to push out leftover meat. That helps clear the head, but it is a pre-step only. The parts still need a full wash.
Step 2: Disassemble the Hopper, Auger, Blade and Plate
Take all meat grinder parts off the head. Most grinders come apart in this order:
- Unscrew the retaining ring at the front.
- Pull off the grinding plate.
- Slide off the meat grinder blade (knife). Grip it by the hub, not the edges.
- Pull the auger out of the head.
- Loosen the head bolt and remove the head from the motor.
- Remove any washer or bushing from the end of the auger.
Lay the parts out in order on a towel. That makes reassembly easy, and you will spot a missing washer at once. If you are still choosing equipment, the meat grinder buying guide covers which heads come apart easiest.
Step 3: Scrub, Rinse and Inspect Every Food-Contact Surface
When cleaning a meat grinder, wash each part in hot soapy water with a brush. Hot water melts fat that cold water leaves behind.
Work the bottle brush through the head and threads. Scrub both sides of each plate and push a toothpick through any blocked holes. Rinse every part in clean, hot water.
Then inspect under good light. Look for fat film, sinew in the plate holes and meat in the threads. If you see any, wash again.
FSIS states that everything that touches food should be clean, and surfaces that touch raw meat should be washed in hot, soapy water. Following strict food safety standards stops cross-contamination and lowers the risk of foodborne illnesses.
Step 4: Sanitize as Directed for the Parts and Product
Sanitize only after the parts are washed and rinsed to maintain strict food safety. An approved food-safe sanitizer requires a wash and a clean-water rinse before application, plus a contact time of at least 1 minute.
| Sanitizer | Mix | Contact time | Notes |
| Unscented bleach (FSIS cutting board rate) | 1 tbsp per gallon of water | Several minutes | Rinse, then dry |
| Quat food-contact sanitizer (one EPA label) | 200 to 400 ppm active quat | 1 minute | Follow your product’s label |
One quat label lists 200 to 400 ppm for a 1 minute contact time on food-contact surfaces, and warns that stainless tools should come out after 10 minutes because long soaks can damage metal. Your product’s label is the rule. Keep contact short on aluminum and tinned parts.
SAFETY: Any grinder part that touched raw meat can carry bacteria. Wash with hot, soapy water first, then sanitize, then dry. Source: USDA FSIS, Cleanliness Helps Prevent Foodborne Illness. Vinegar and a quick rinse do not replace a full wash.
Dry and Store the Parts: Steps 5–6
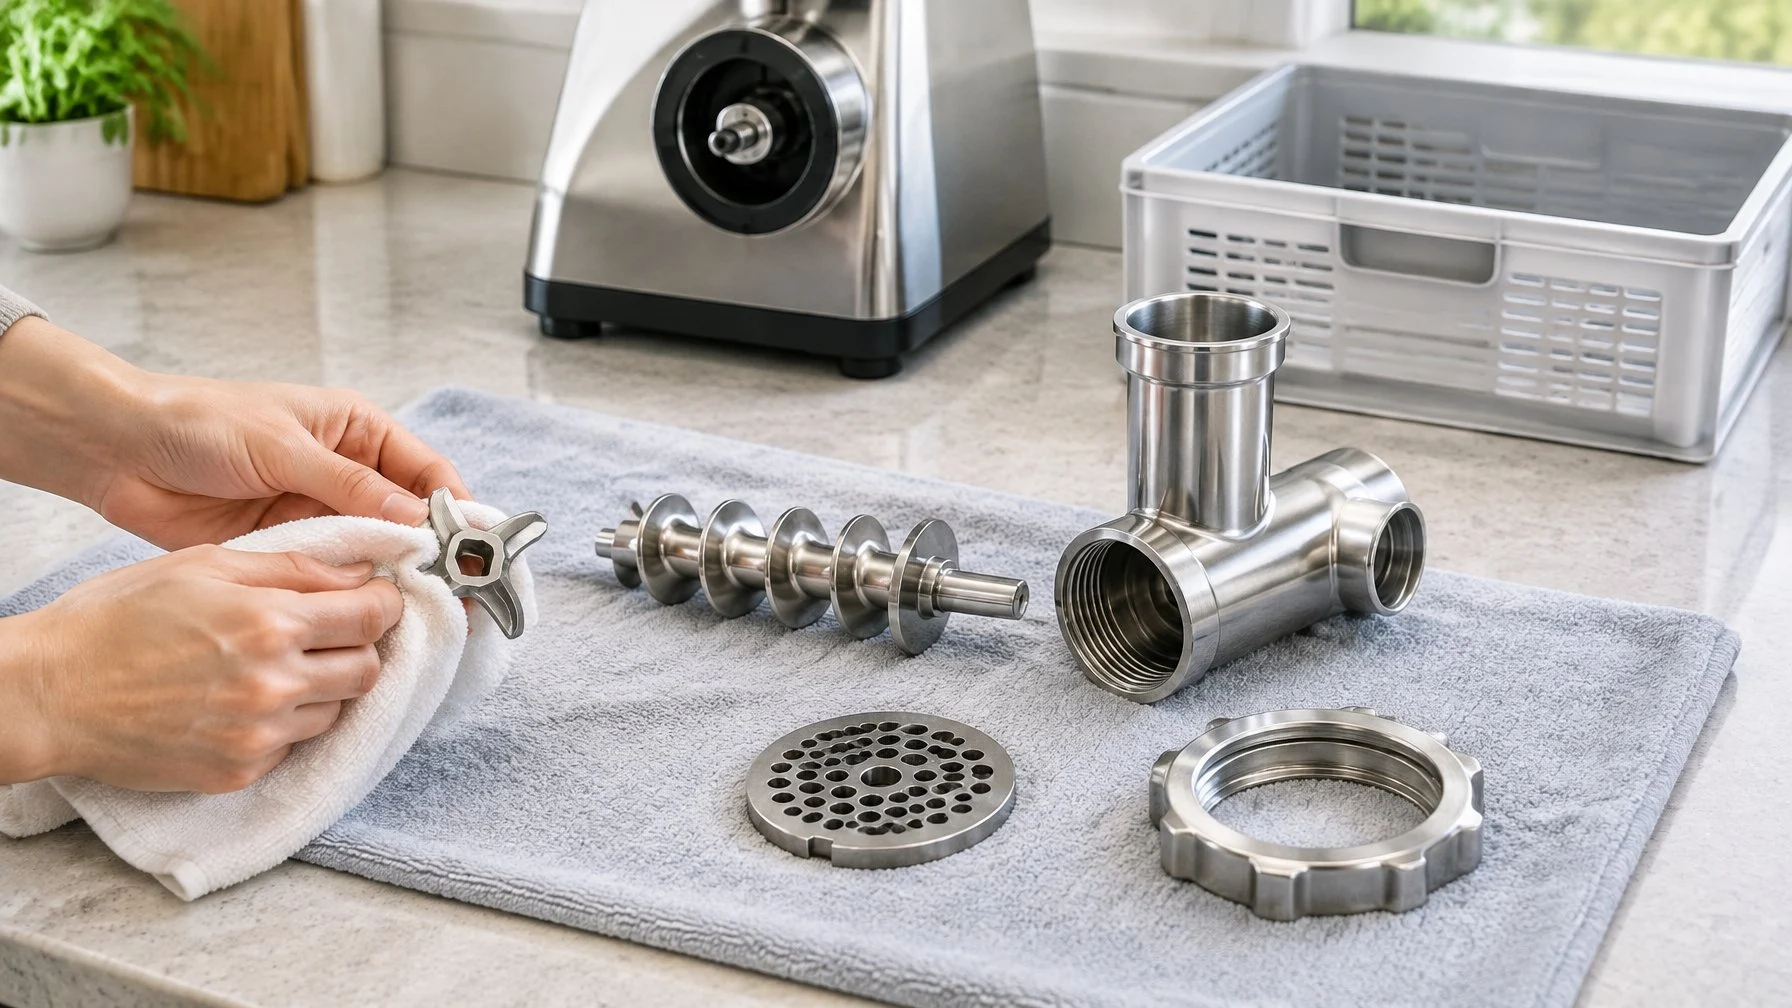
The last two steps are drying tight spots and protecting bare meat grinder parts before storage. When it comes to preventing rust, speed and thorough drying are essential. Skip either step and the plate will rust quickly.
Step 5: Dry the Plate Holes, Threads and Other Crevices
Hand-dry every part right after rinsing. One LEM manual says to hand-dry immediately, never soak, and keep parts out of the dishwasher because discoloration can occur.
Pay extra attention to these spots:
- Plate holes. Tap the grinding plate on the towel, then blot both faces.
- Ring and head threads. Twist a corner of the towel into the grooves.
- Inside the head. Push a dry towel through with the bottle brush handle.
- Auger flutes. Wipe along each spiral.
Let parts sit on a dry towel for a few minutes so trapped water can drain, then wipe again. Do not leave them to air-dry overnight.
Step 6: Protect Rust-Prone Metal and Store the Parts Dry
Coat the knife and plates with a thin film of food-safe lubricant. LEM’s hand grinder manual says to coat the head, auger, knife and plates with food grade silicone spray after drying to prevent oxidation.
Food-grade mineral oil is a common alternative. A light layer of food-safe mineral oil shields carbon steel from humid air and keeps parts moving smoothly. Check your manual first.
Store parts in a dry place:
- Bag the knife and plates in a zip-top bag with a dry paper towel.
- Keep the head and auger together so parts do not go missing.
- Store away from the sink and the dishwasher’s steam.
- Before next use, wash off the oil film and chill the head.
Chilling the head pairs well with cold meat. See how long to freeze meat before grinding for that step.
Grinder Plate Rust: Stainless vs. Carbon Steel, Oiled vs. Dry
Bottom line: Owner reports don’t give measured rust rates. They describe consistent patterns. Carbon steel plates can rust overnight if stored damp or unoiled. Oiled storage largely prevents this. Stainless rarely rusts but isn’t immune.
| Material | Stored dry (unoiled) | Stored oiled |
|---|---|---|
| Carbon steel | Can show surface rust overnight if any moisture remains, especially inside holes and on edges | Owners and vendors report little to no rust when wiped dry and coated |
| Stainless steel | Generally rust-resistant due to chromium; occasional light spotting if left wet | Rarely needed, but a light food-safe oil adds protection |
What Owners Report About Plate Rust
- Overnight rust is a real owner complaint. One #32 grinder owner washed the plates at night and found rust “inside the holes and on outer edges” by morning. They had assumed the plates were stainless. (Facebook – MEAT Processing Enthusiasts)
- Many “stainless” grinders use carbon steel plates and knives. Grinder bodies are often stainless, but plates and knives are frequently carbon steel, which is the vulnerable part. (MeatGrinderPro)
- Carbon steel is chosen for edge retention, at the cost of rust resistance. (MeatGrinderPro)
- Oil storage is a common owner approach. Hunters discuss keeping plates and knives submerged in vegetable oil in a small container. (Rokslide)
- The care guidance is consistent across vendors:
- Hand wash in hot, soapy water, not the dishwasher.
- Dry immediately and completely. (High Caliber Products)
- Clean and lubricate regularly. (Kasco)
Practical Tips to Keep Plates From Rusting
- Choose your oil carefully. Food-grade mineral oil is usually preferred over vegetable oil for long storage, because vegetable oil can go rancid or turn gummy.
- Dry the holes thoroughly. Moisture trapped in plate holes is the most common rust spot. A low oven or a blast of air helps.
- Store in a sealed bag or container, ideally with a desiccant pack.
Making this routine part of your regular meat grinder care keeps the cutting edges sharp. Simple meat grinder maintenance prevents costly replacement plates and guarantees smooth grinding for years.
Troubleshooting Common Cleanup Problems
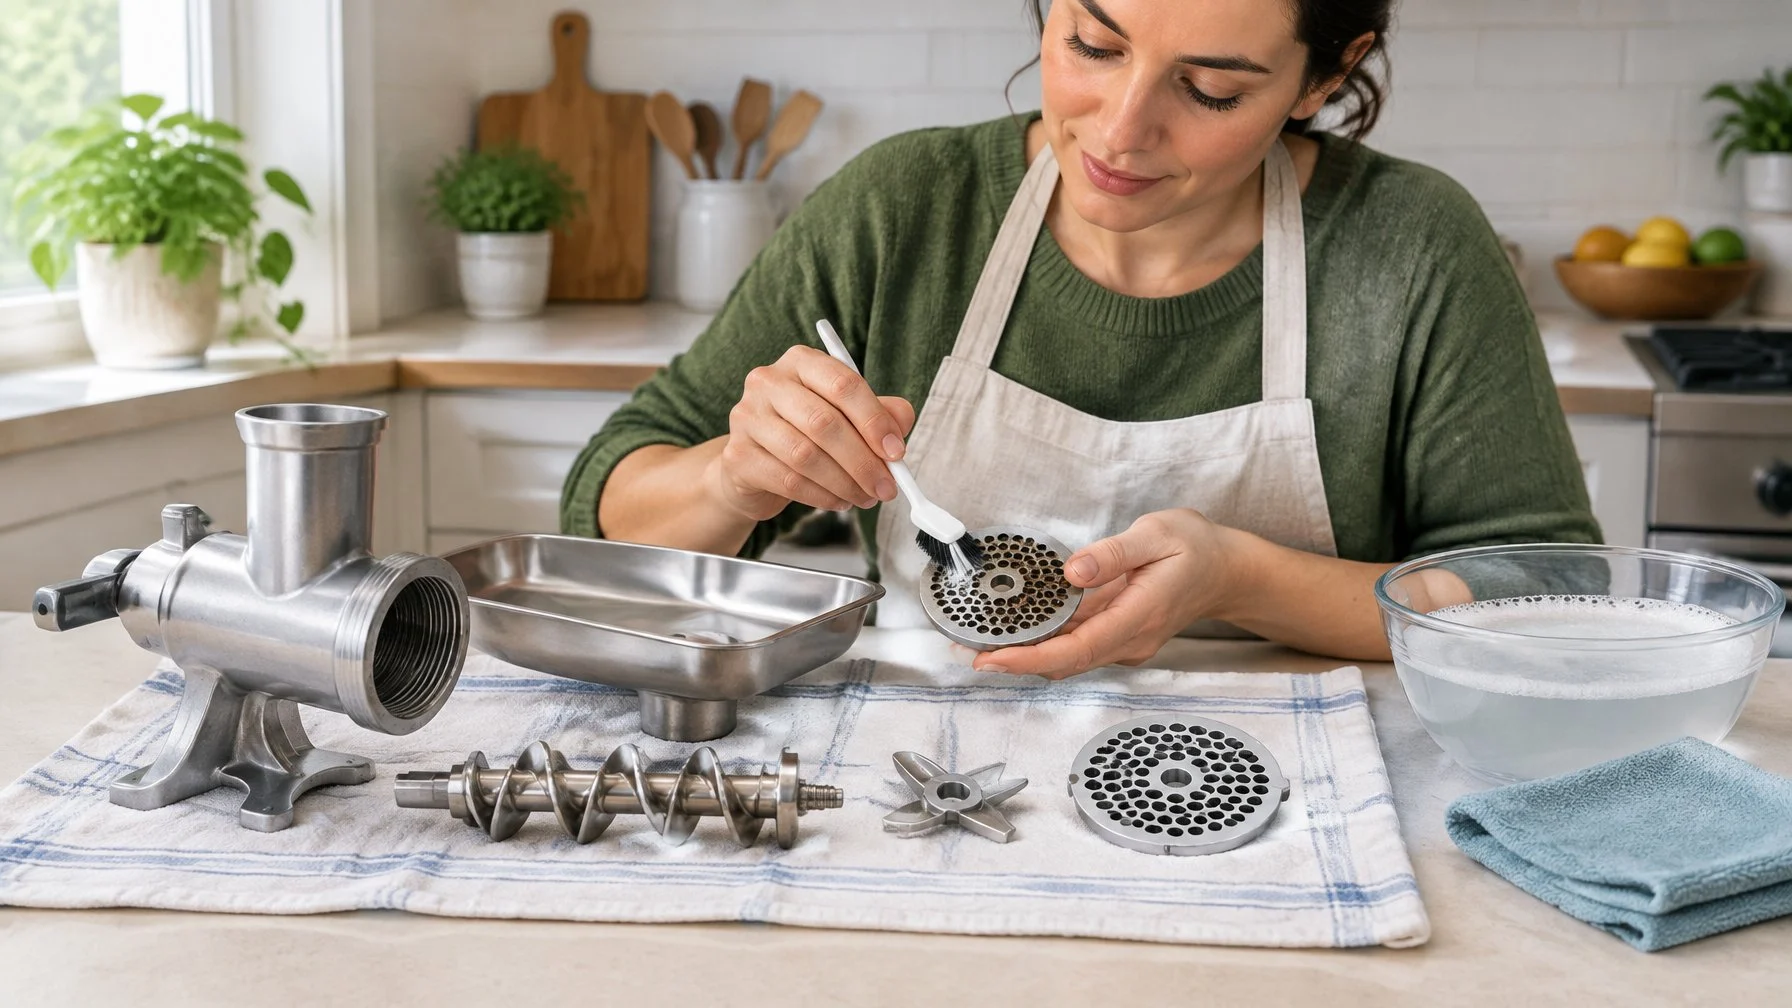
Most meat grinder cleaning trouble comes from four spots: packed plate holes, a smell that hangs on, rust spots, and a blade or plate that sticks. Each has a direct fix.
Meat Is Stuck in the Plate Holes
Push it out from the back side with a toothpick or plate-hole brush. The holes taper slightly, so pushing from the knife side clears them faster.
If fat has hardened, run hot water over the grinding plate for 30 seconds first, then brush. A soft brush on both faces finishes the job. Clean the plate right after grinding next time, before fat sets.
The Grinder Still Smells After Washing
A smell means fat or meat is still trapped somewhere. Check the threads, the auger’s rear end, the bushing and the inside of the head throat.
Take everything apart again and rewash with fresh hot, soapy water. Smell is a cleaning problem. Scented sprays and vinegar only cover it.
Rust or Discoloration Appears on a Part
Light orange spots on a carbon steel plate or knife can be scrubbed off with a nylon scrub pad and soapy water. Rinse, dry at once and oil.
Gray or dark staining on cast aluminum is often dishwasher damage. It does not wipe off. If rust has pitted the cutting face of the knife or plate, replace the part, because pits hold bacteria and dull the cut.
A Blade or Plate Will Not Come Free
Dried fat often glues the grinding plate to the knife. Run hot water over the front of the head for a minute, then try again.
If the retaining ring is stuck, wrap it in a dry towel for grip. Turn it by hand. Avoid pliers on threaded rings, which can crack aluminum. Next time, hand-tighten the ring only. If you grind often, the best meat grinders roundup notes which models use stainless plates that resist sticking and rust.
Frequently Asked Questions
These answers cover the questions owners ask most about cleaners, plate holes, dishwashers, sanitizing and the bread trick.
What is the best thing to clean a meat grinder with?
Hot soapy water and mild dish soap, plus a soft brush and a bottle brush, clean a meat grinder best. Soap and heat lift the fat that holds bacteria.
After washing and rinsing, use a food-safe sanitizer mixed by its label, or a mild bleach solution. Skip harsh abrasives on aluminum parts, since they scratch the surface and make it harder to clean next time.
How do I clean the small holes in a grinder plate?
Push each hole clear from the back side with a toothpick, a skewer or a plate-hole brush. Rinse the plate under hot water first if the fat has hardened. Then scrub both faces with a soft brush, rinse again and look through the plate toward a light. Any hole that still looks cloudy needs another pass before you dry and oil it.
Can meat grinder parts go in the dishwasher?
Most grinder parts should not go in the dishwasher. Several manufacturers, including LEM, mark their grinder parts not dishwasher safe because harsh detergent and heat discolor aluminum and strip protective coatings. Carbon steel knives and plates rust in the long wet cycle. Some stainless parts are rated for it, so check your manual before trying. Hand-washing is the safe default.
Do I need to sanitize a meat grinder after every use?
Yes, sanitize after every session to prevent cross-contamination from raw meat. Washing removes fat and soil, and sanitizing reduces bacteria left on clean surfaces.
Use a food-safe sanitizer by its label, often with a 1 minute contact time, or a dilute bleach solution. Then dry every part at once so the metal does not sit wet.
Should I run bread through the grinder before cleaning it?
Running a slice of bread through helps push leftover meat out of the auger and head. Some manufacturer manuals suggest it. Treat it as a pre-step only. The bread does not remove fat film or bacteria, so you still need to take the grinder apart, wash, rinse, sanitize and dry each part. It is most useful between batches when making sausage.
Next, compare models that are easy to clean in our LEM Big Bite grinder reviews.
This is general guidance based on USDA recommendations. When in doubt, follow the USDA FSIS source linked above.