
Sharpen a grinder knife and plate by lapping their flat mating faces on a flat, supported abrasive, using light, even pressure until both faces show a uniform, bright finish. Leave the knife’s angled bevels alone; a kitchen-knife approach rounds the edges that need to meet. The job takes common shop supplies and one careful cleanup.
Knowing how to sharpen meat grinder blades at home saves time and prevents wasted batches. After reading, you will be able to restore a clean cut, check whether the fault was the blades, and tell when a part needs replacing.
You will also get the food-safety numbers for meat waiting on a half-finished grind and assembly details from manuals that most guides skip.
How Do You Sharpen Meat Grinder Blades?
Lapping is about flatness, not a new bevel. As you work the knife or plate on a flat abrasive, the uneven marks from wear give way to one even, matte scratch pattern across the whole face. That even pattern is the usual sign the surface is flat. A brand-new diamond plate can fool you at first. In Science of Sharp’s microscope look at a new diamond plate, loose and broken diamonds caused stray deep scratches until a short break-in on hardened steel knocked them free.
What You Need to Sharpen the Knife and Plate
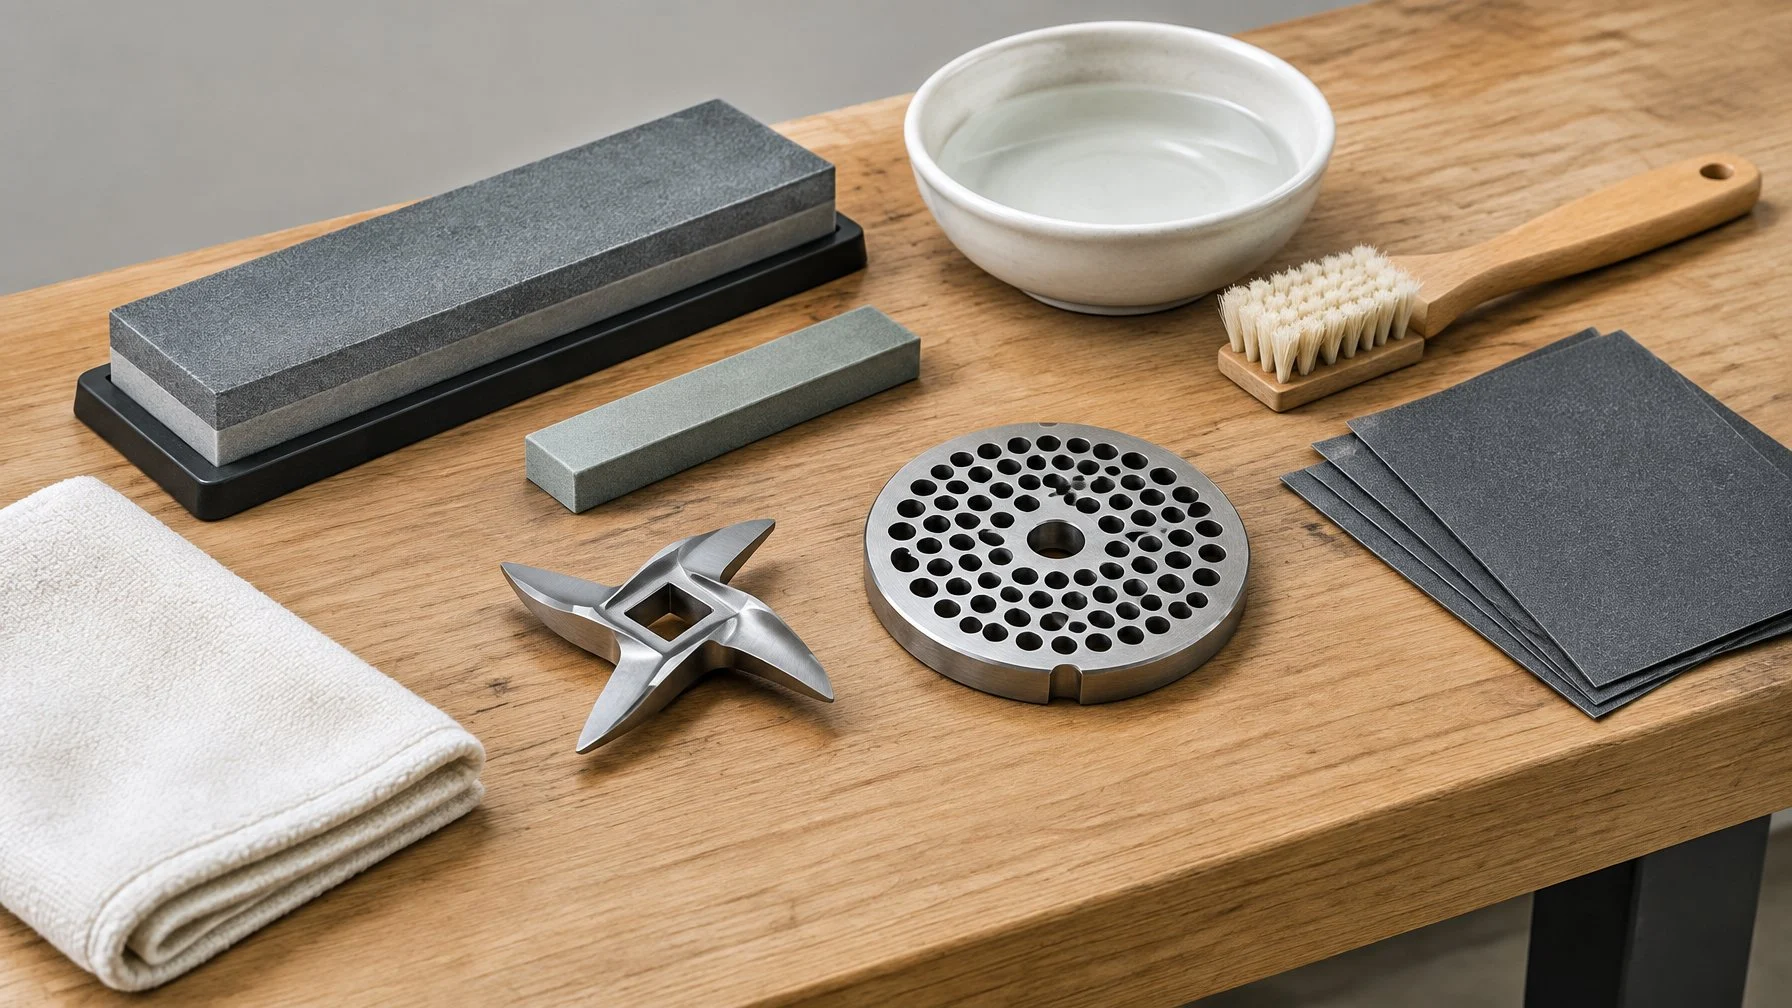
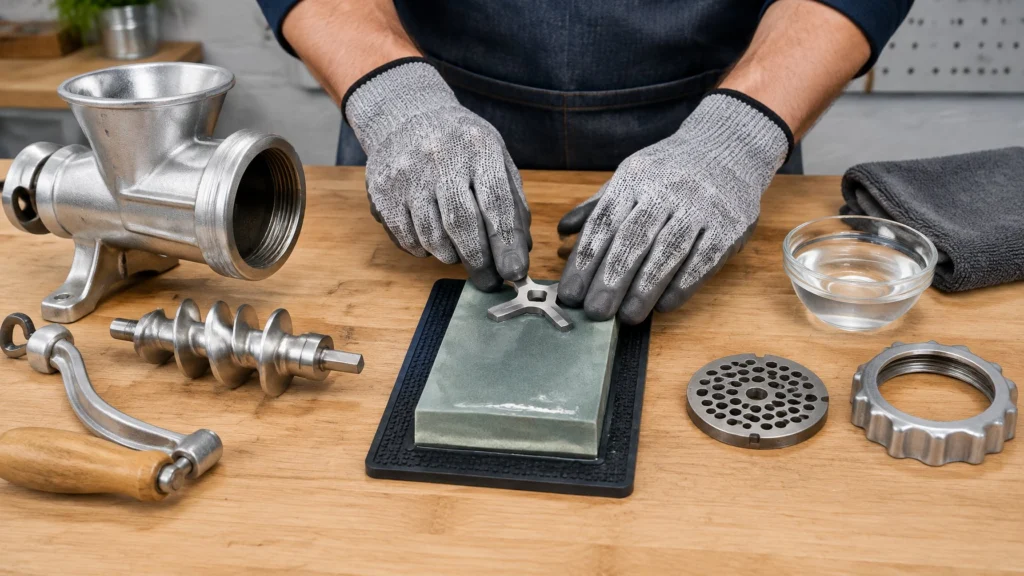
You need two kinds of supplies: a dead-flat surface with an abrasive on it, and supplies for cleaning and hand protection. Before sharpening meat grinder blades, gather these common hardware items to ensure clean results.
A Flat Surface and the Right Abrasive
Flatness is the whole job. Effective meat grinder knife sharpening relies on maintaining a truly planar surface. The knife and plate cut like a pair of scissors pressed face to face, so any dip in your work surface transfers to the steel.
Grinder knife lapping means rubbing the flat face of the knife on a flat abrasive until it meets the plate with full, even contact.
| Item | What it does | Notes |
| Flat backing (glass sheet, granite tile or stone slab) | Keeps the abrasive dead flat | Thick glass or granite stays truer than a wood bench |
| Wet/dry sandpaper, medium and fine-grit | Removes wear, then smooths the face | Wet use keeps metal dust in a slurry |
| Flat sharpening stone (optional) | Replaces sandpaper | Only works if the stone face is flat |
| Water or a drop of dish soap | Lubricates and carries off grit | Avoid sticky oils on paper |
| Marker | Shows where steel is being removed | Color the face, then watch the ink wear off |
Sharpening stones work well when their face is flat. A dished stone puts a curve into your knife. Some oilstones require honing oil, but water or a drop of dish soap is usually safer and simpler to wash away completely before processing food.
Cleaning Supplies and Hand Protection
Sharpening meat grinder parts leaves fine metal and abrasive dust on every component. You need to remove all of it before meat touches the steel.
- A stiff nylon brush for the plate holes
- Hot water and dish soap, or a food-safe cleaning solution
- Lint-free towels for drying right away
- Cut-resistant gloves; the knife edges and plate holes stay sharp through the whole job
- Food-grade silicone spray or food-grade mineral oil for storage
Sharpen the Mating Faces in 6 Steps
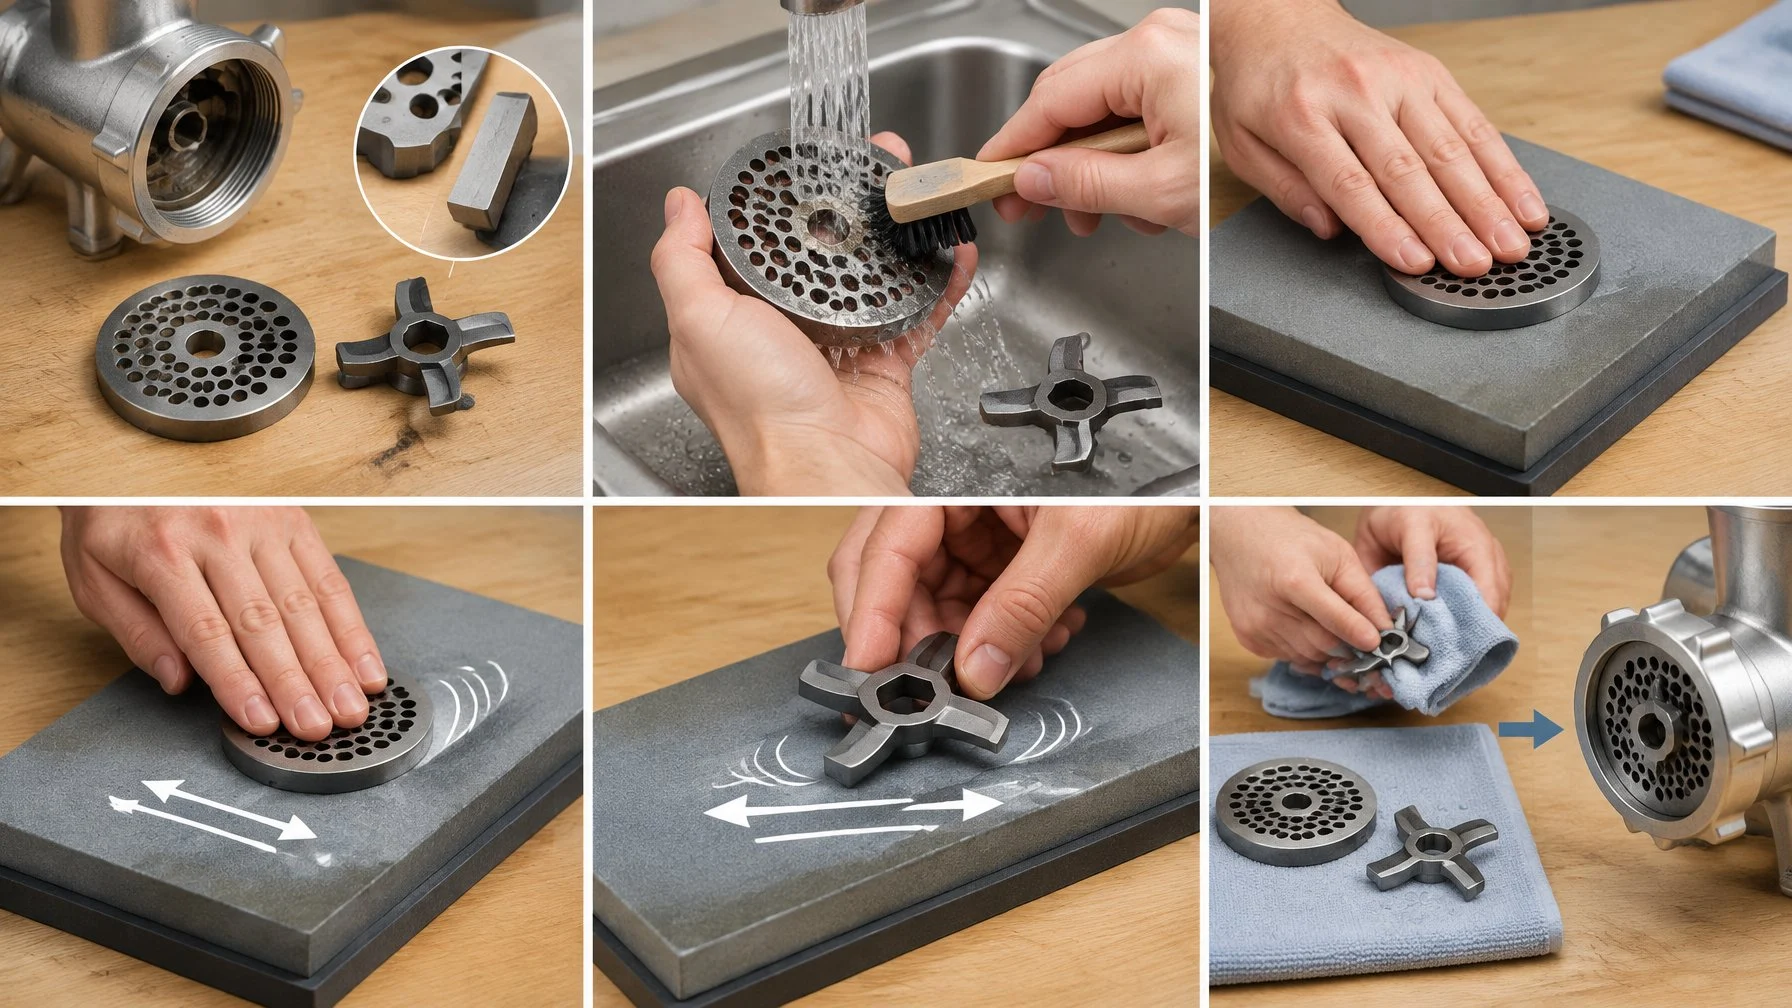
Successfully sharpening meat grinder blades requires addressing both the rotating knife and the stationary plate. The six steps run from teardown and inspection through lapping to cleanup and a trial grind.
SAFETY: Unplug the grinder before you take anything apart. Remove every trace of abrasive and metal residue before meat goes back through the head. Keep the meat refrigerated at 40°F or below while the grinder is apart; USDA FSIS food safety basics also say perishable food should not sit out over 2 hours (1 hour above 90°F).
1. Unplug, Disassemble, and Wash the Parts
Switch off and pull the plug before you touch the head. A live switch and an exposed auger is how fingers get hurt.
Remove the retaining ring, plate, knife and auger. Wash these meat grinder parts in hot, soapy water and dry them right away. Fat and meat residue clog the abrasive and hide wear marks.
If you stopped mid-grind, put the meat back in the fridge now. Read how long to freeze meat before grinding if you want to chill it firm for the restart.
2. Inspect the Contact Faces and Set Up the Abrasive
Look at the flat face of the knife and the face of the plate that touches it. Wear shows as shiny tracks, rounded edges or a light ring of rust. Chips, cracks or deep gouges mean replacement, covered below.
Proper preparation is key when sharpening meat grinder blades. Lay the sandpaper on glass or granite and wet it. Color the knife’s flat face with marker, which reveals where steel comes off.
3. Lap the Flat Face of the Knife
Learning how to sharpen a meat grinder blade comes down to flat contact. Hold the knife flat with all blades touching the paper, keeping pressure light and even. Pushing harder on one side tilts the face.
- Move the knife in slow figure-eights for 10 to 15 passes.
- Rotate the knife a quarter turn in your hand and repeat. This spreads the wear evenly.
- Check the ink. Stop when every blade face shows bright, even steel to the edge.
- Switch to fine-grit sandpaper and repeat a few passes to smooth the scratch pattern.
Touch only the flat face that meets the plate. The angled back bevels stay as they are.
4. Lap the Face of the Plate That Meets the Knife
To sharpen meat grinder plate surfaces, mark the knife side of the plate, since that is the only cutting face. A complete guide on how to sharpen meat grinder blades must include the plate, as neither part works in isolation.
Color the plate face, then lap it in the same figure-eight pattern with flat, even pressure.
Plates are wider, so keep your fingers spread across the whole disk. Stop when the ink is gone from the outer ring and around the holes. Finish on fine paper.
5. Remove Grit and Metal Dust, Then Dry
Scrub both parts in hot, soapy water. Run the brush through every hole in the plate. Grit and metal dust hide there.
Rinse, then towel-dry at once. Both LEM manuals tell owners not to soak parts or let them air-dry. A manual for a commercial grinder also advises running a light, disposable load first to clear metal shavings, a sensible step after lapping.
6. Reassemble and Check the Grind
Fit the knife with its sharp, flat face pointing out toward the plate. Line up the plate notch with the locating pin. Snug the ring by hand only.
The LEM manual for the MightyBite #8 grinder says over-tightening adds wear to the knife and plate. Run a small handful of chilled scrap and toss it. Clean strings from the plate mean the faces are cutting cleanly and grinding efficiency is restored.
What If Sharpening Does Not Fix the Grind?
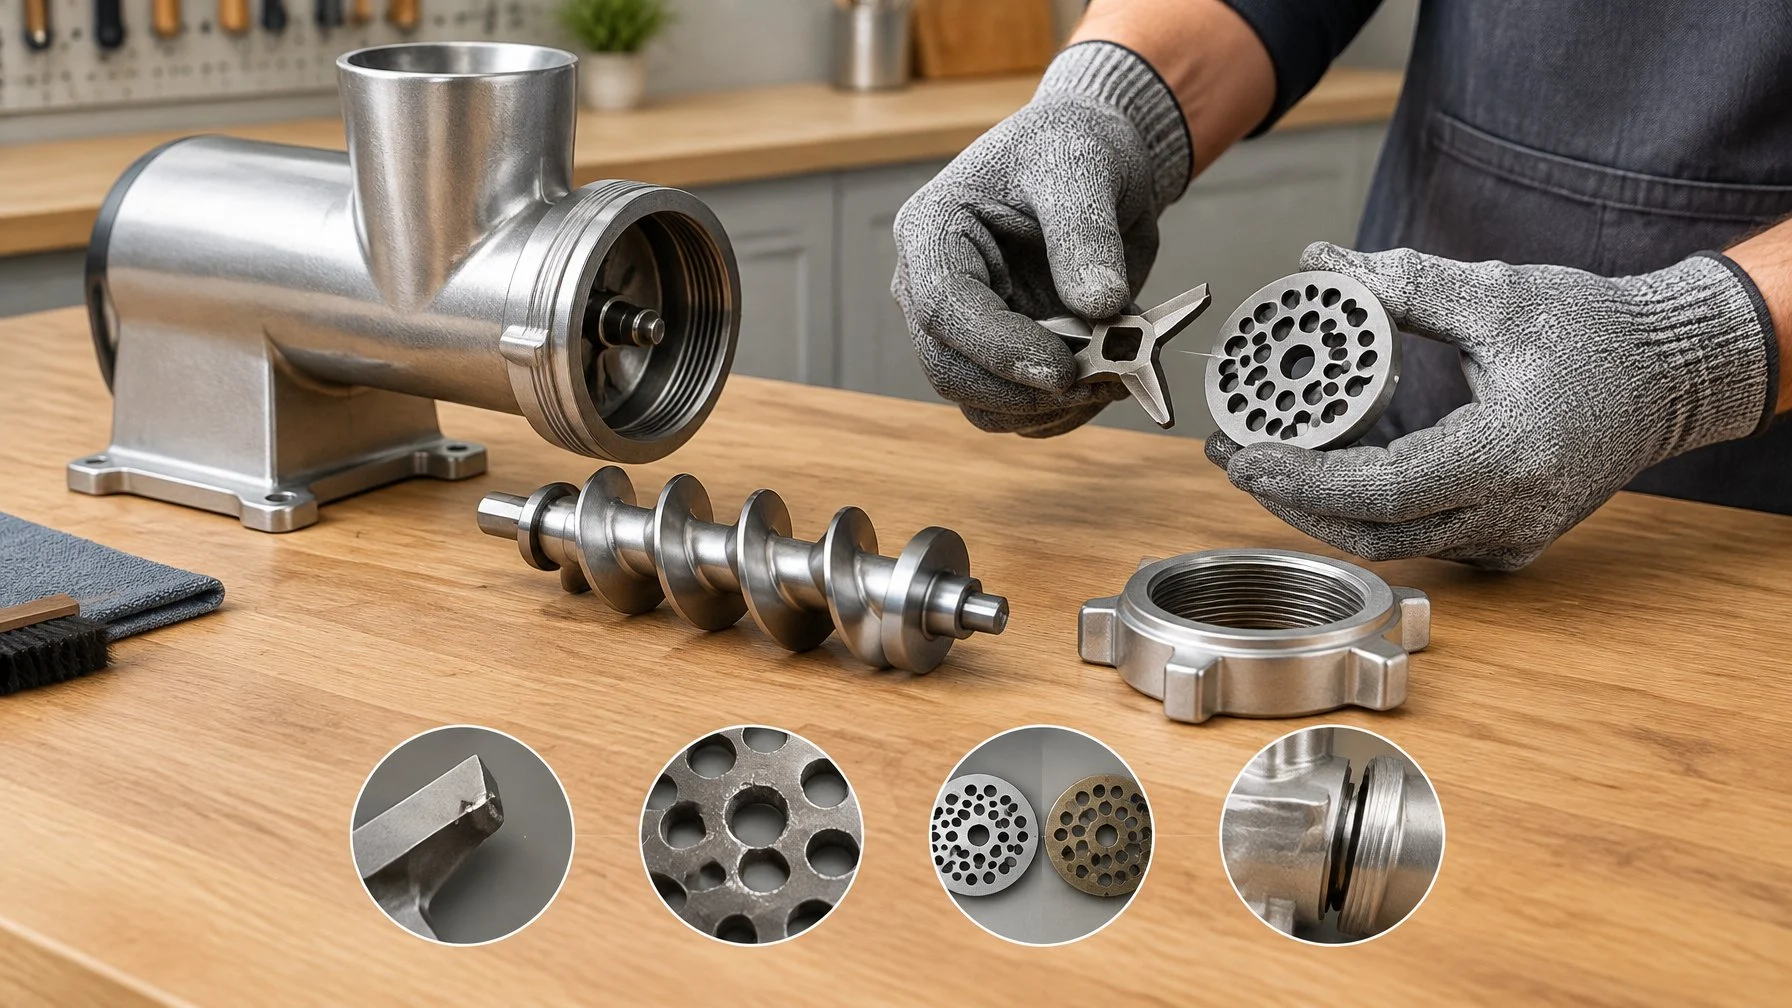
When the grind stays poor after lapping, check four things: meat temperature and knife direction, flat contact, blockages and plate size, and whether the parts are worn out. Each has its own fix.
| Symptom | Likely cause | Fix |
| Meat smears or mashes | Warm meat or knife reversed | Chill meat; flip knife |
| Gap or rocking between knife and plate | Warped or over-lapped parts | Replace the pair |
| Grinder strains or slows | Sinew wrap or plate too fine | Clear the head; start coarse |
| Chips, cracks, deep gouges | Bone or metal contact | Replace or send out |
Meat Still Smears: Check Temperature and Knife Orientation
Warm fat smears no matter how sharp the steel is. If you still encounter problems after sharpening meat grinder blades, check meat temperature. The LEM troubleshooting notes say to chill meat to 40° and confirm the plate and knife are installed correctly when meat mashes.
A reversed knife scrapes the plate instead of shearing. Check that the flat cutting face points toward the plate. Also check ring tension: the LEM hand grinder manual notes that under-tightening causes mashing, so snug it slightly more and retry.
The Knife and Plate Do Not Sit Flat: Check for Wear or Damage
Hold the lapped knife against the plate face up to a light. Light showing through means they do not meet evenly.
Light, even gaps sometimes close with a few more passes on fine paper. A rocking knife or a dished plate usually means the steel is warped or over-sharpened. Removing more metal makes it thinner and does not fix the bend.
The Grinder Still Strains: Check for Blockages and Plate Size
Stop the motor the moment it labors. Do not force meat through with the stomper. Unplug, open the head, and clear sinew and silver skin wrapped around the knife hub.
Trim meat better and grind through a coarse plate first, then go fine. Running a grinder empty also hurts it; the Omcan manual warns its head can reach 180°F in about 3 minutes with no meat feeding. If your machine strains on every batch, our meat grinder size guide covers matching motor and plate size to volume.
When Should You Replace the Parts or Use a Sharpening Service?
Replace the knife and plate when you see chips, cracks, deep gouges, warping, or a knife so thin it flexes. Replace them as a matched pair when you can, since they wear into each other.
A meat grinder blade sharpening service makes sense for large or costly commercial plates, where a machine-ground face beats hand work. For home grinders, a new knife and plate often costs less than shipping to a service.
Grinder Knife and Plate Set: Sharpen vs. Replace (U.S. Estimates)
The search results cover kitchen knife sharpening, not meat grinder knife and plate sets. The figures below come from my general knowledge of typical retail and service pricing. They are approximate and should be checked against current vendors.
| Option | #8 set | #12 set |
|---|---|---|
| Professional sharpening (knife + plate) | ~$10–$25 | ~$12–$30 |
| Replacement set (budget stainless) | ~$10–$25 | ~$15–$35 |
| Replacement set (premium/OEM, e.g., LEM, Weston, or carbon steel) | ~$25–$50 | ~$30–$60+ |
Key takeaway: For #8 and #12 sizes, sharpening often costs about the same as a budget replacement once you add shipping. Mail-in services commonly add $8–$15 each way. Sharpening makes the most sense for premium or OEM sets, carbon steel plates, or when a local shop can do it without shipping.
Once clean and dry, coat the parts lightly with food-grade silicone spray or food-grade mineral oil to prevent rust.
Sharpening Grinder Blades: Quick Answers
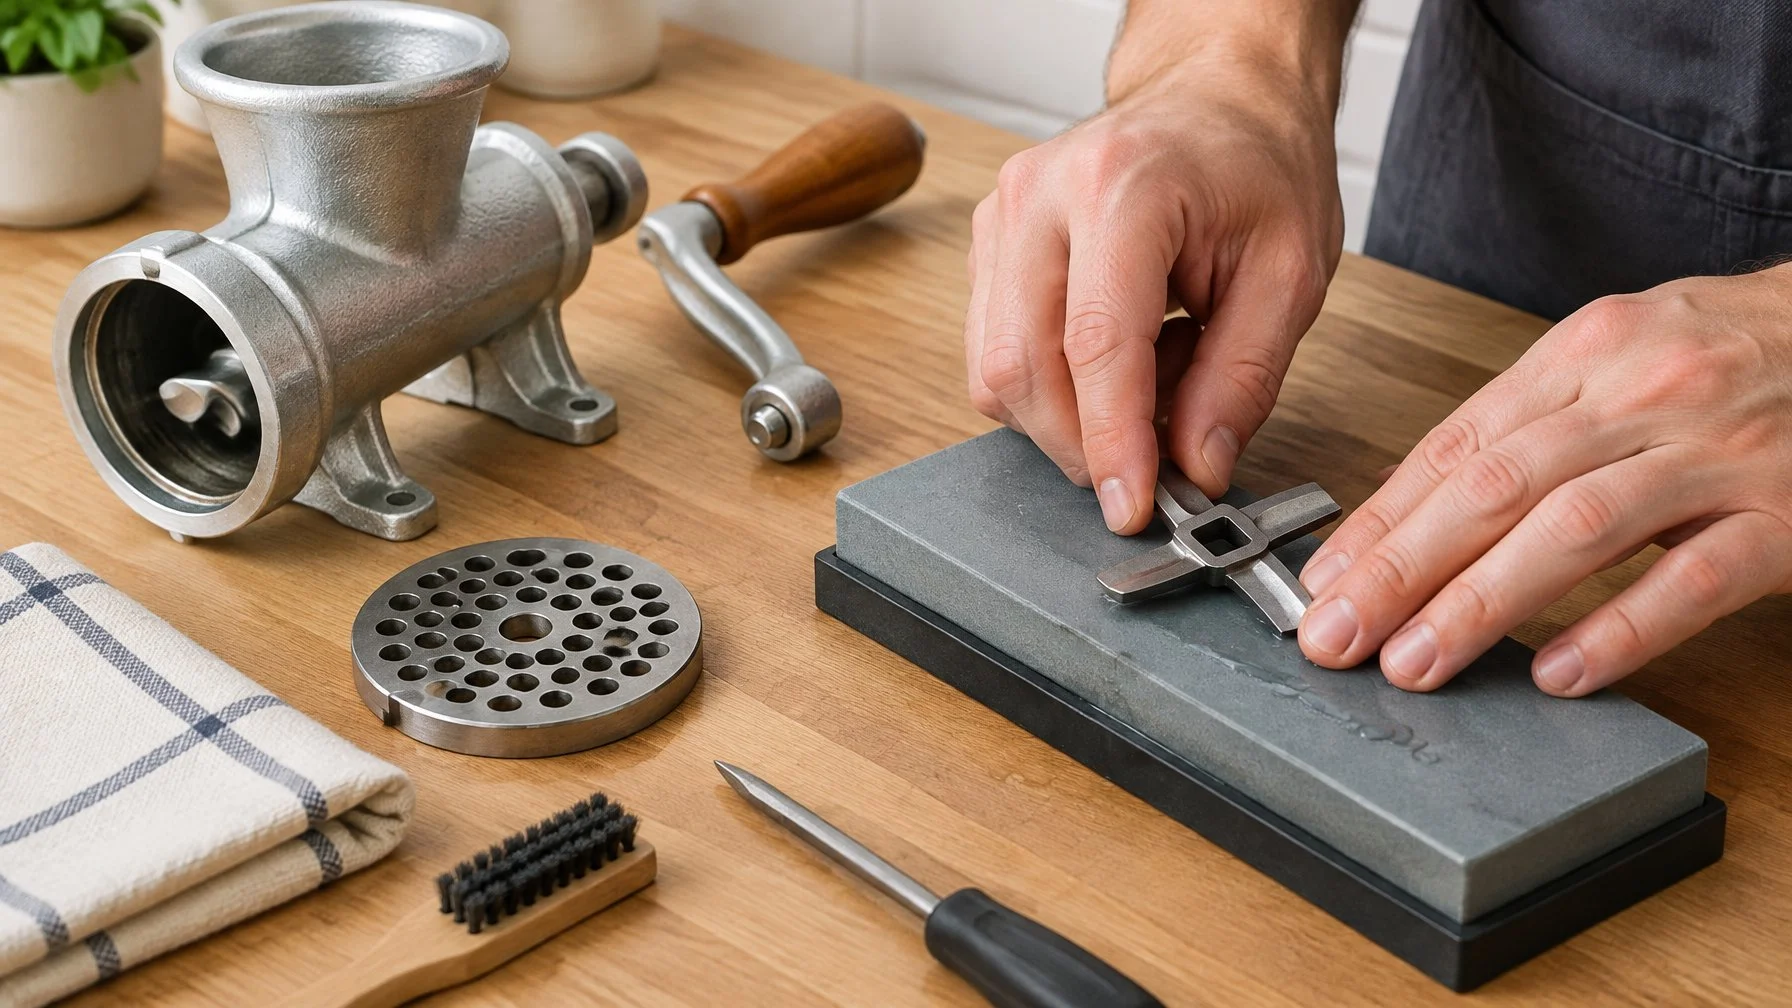
Do meat grinder blades get dull?
Yes. The knife and plate rub steel on steel every time the auger turns, so their faces wear down and round off. Learning how to sharpen meat grinder blades is a routine maintenance task for anyone who grinds meat regularly.
Bone chips, over-tightened rings and running the grinder empty speed up wear. The LEM manual lists a dull knife or plate as one cause of mashed meat, along with warm meat and poor assembly.
Can I sharpen meat grinder blades with sandpaper?
Yes. Wet/dry sandpaper on a sheet of glass or a granite tile works well for lapping the knife and plate faces. Start with a medium paper to remove wear, then finish on a fine paper. The flat backing makes it work, because soft or uneven surfaces put a curve into the steel.
Can I use a sharpening stone instead of sandpaper?
Yes, if the stone face is flat. A dished stone from years of knife sharpening rounds the knife face and leaves gaps against the plate. Flatten the stone first, or use it only for the plate.
While some natural whetstones call for honing oil, water is much easier to degrease completely. Keep the stone wet with water and use the same figure-eight pattern and light pressure.
Should I sharpen the grinder plate and blade together?
Yes. The knife and plate cut as a pair, and a fresh knife against a worn plate still leaves gaps. Lap both faces in the same session and keep them together afterward. If you own several meat grinder plates, lap each one, since every plate wears in its own pattern against the knife.
Can I use a knife sharpener or honing steel on a grinder blade?
No. A knife sharpener or honing steel is built for angled bevels on a kitchen blade. A grinder knife cuts with its flat face against the plate, so a pull-through sharpener or steel rounds the edge you need. Honing oil is also unnecessary; water works on wet/dry paper and most stones.
What are the most common mistakes when sharpening grinder blades?
Uneven pressure, a non-flat surface and over-sharpening top the list. Others include grinding the bevels, leaving grit in the plate holes, and reinstalling the knife backward. Over-tightening the retaining ring after sharpening also wears the fresh faces quickly. Keep pressure light, stop when the ink disappears, and hand-tighten the ring.
If your parts are past saving, compare replacement options in our best meat grinders roundup.