
Most “won’t seal” problems come down to four things, and four maker manuals agree on them: wrinkles or creases in the bag edge, liquid or crumbs in the seal area, the bag end placed wrong, and a dirty or damaged gasket. Each maker words it differently, and the numbers change by model. Check your own manual first.
After reading, you can work through those four causes in order at the counter, wait the right amount of time between seals for your model, and decide if a gasket needs cleaning or replacing. We read the FoodSaver V4400, NESCO VS-12, Weston PRO-2100/2200/2300 and Avid Armor USV20 manuals side by side. That lets you see where makers disagree instead of trusting one blanket rule.
What Do You Need Before You Troubleshoot a Sealer?
You need two things on the counter: the manual for your exact model, and a bag the maker approves plus a few basic cleaning supplies.
Find the Manual for Your Exact Model
Your manual is the rulebook. Wait times, bag placement and gasket care all change from one model to the next, even inside one brand.
- Find the model number for your unit.
- Download the manual from the maker’s site. Search by model number.
- Note the edition year. Wording changes between printings, so the FoodSaver lines quoted here come from the 2022 Newell edition of the V4400 manual.
- Open the troubleshooting table, if your manual has one. The Weston PRO manual has none, so you read its operating and cleaning pages instead.
Do not assume one maker’s wording covers its other models. A rule for the V4400 is a rule for the V4400.
Gather a Compatible Bag and Cleaning Supplies
Makers want bags sold for their sealers, not household bags.
Makers are strict about bags:
- FoodSaver V4400: “use only with FoodSaver ® Bags, Rolls, Containers and Accessories.”
- Weston PRO: “ONLY intended to be used with VACUUM BAGS,” and “DO NOT USE HOUSEHOLD BAGS!”
- Avid Armor USV20: warns that some bags are “not recommended.”
- NESCO VS-12: silent on a bag-type limit.
For cleaning, keep a damp cloth and a dry towel nearby. The Weston manual says to unplug the unit, let it cool fully, wipe surfaces with a damp cloth, and never rinse the sealer under the tap. It also warns against abrasive cleaners and against peeling the seal bar tape.
What Should You Check First When a Sealer Will Not Seal?
Work from the bag edge outward: wrinkles first, then moisture and crumbs, then bag position, then the gasket, then cool-down time. Each check comes straight from the four manuals.
1. Flatten the Bag Edge to Remove Wrinkles and Creases
Smooth the open end flat before you close the lid. A fold gives air a path back in.
- FoodSaver V4400: “A wrinkle along the seal may cause air to re-enter the bag.”
- NESCO VS-12: “Leaks along the seal can be caused by wrinkles, crumbs, grease or liquids.”
- Weston PRO: “no folds or creases in the bag in the sealing area.”
- Avid Armor USV20: pouch “flat and straight across the seal bar.”
Run your fingers along the edge once, then load it.
2. Clean and Dry the Seal Area to Remove Liquid and Crumbs
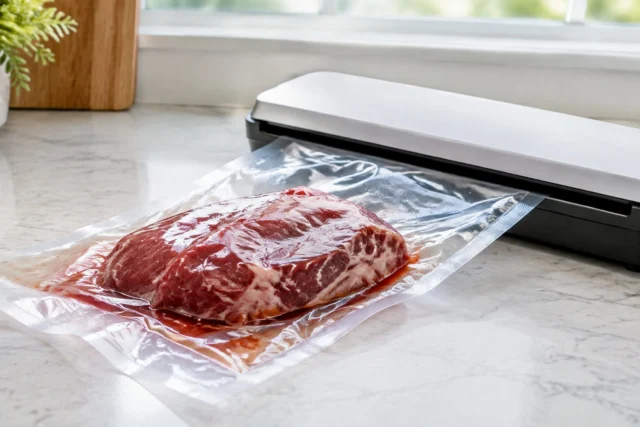
Wipe the inside of the bag top and the machine’s seal area. Weston says moisture can interfere with the seal bar’s ability to fuse the bag layers; NESCO lists wrinkles, crumbs, grease or liquids as causes of leaks.
- NESCO VS-12: wipe the inside of the bag top, and wipe liquid from the chamber.
- FoodSaver V4400: “Too much liquid in bag; freeze before vacuuming.”
- Weston PRO: excess moisture can interfere with the seal bar; freeze very moist foods first.
- Avid Armor USV20: “clean and dry the seal area and try again.”
Wet cuts and marinades have their own rules, covered in SaltRail’s guide to vacuum sealing wet meat and liquids.
3. Position the Bag End Exactly as Your Manual Shows
Place the open end where your manual says. Each design has a different target spot.
| Model | Where the bag end goes |
|---|---|
| FoodSaver V4400 | Open end down inside the Drip Tray |
| NESCO VS-12 | “Entirely inside vacuum chamber area” |
| Weston PRO | Between the lid seal and the seal bar |
| Avid Armor USV20 | “Entire bag should remain inside the chamber” |
The Avid Armor is a chamber sealer, so the whole pouch sits inside. If you are unsure which type you own, the chamber vacuum sealer vs vacuum sealer comparison explains how each one works.
4. Check the Gasket Using Your Model’s Care Instructions
Look at the gasket for dirt, flattening or cracks. A gasket that does not close tight lets the machine lose its vacuum.
- FoodSaver V4400: check the lower gasket. “Do not attempt to remove gaskets.”
- NESCO VS-12: when distorted or broken, “Clean and dry or replace.”
- Weston PRO: the oval chamber seals “may wear over time and require replacement”; a maintenance kit with seals and tape is sold separately.
- Avid Armor USV20: “Clean and dry or replace.”
5. Follow Your Model’s Cooling Instructions Before Continuing
Wait between seals for the time your manual gives.
The Weston manual says to wait at least 20 seconds between cycles to help prevent overheating, and that the Teflon tape stays hot for a brief time after each sealing cycle. The four makers give different numbers, shown in the table in the next section. If your unit shuts off from overheating, use the wait in your own manual.
What Do the Four Manuals Say?
The four makers agree on the causes but disagree on wait times, gasket care and bag rules. One table lines up causes, placement and gaskets; the second shows timing and bag limits.
Compare Causes, Bag Placement, and Gasket Instructions
“Silent” means the manual says nothing on that point.
| Cause | FoodSaver V4400 | NESCO VS-12 | Weston PRO-2100/2200/2300 | Avid Armor USV20 |
|---|---|---|---|---|
| Wrinkle | Air may re-enter | Leaks from wrinkles | No folds or creases | Flat and straight |
| Moisture | Freeze before vacuuming | Wipe bag top and chamber | Freeze very moist foods | Clean and dry seal area |
| Bag end position | Down in Drip Tray | Entirely in chamber area | Between lid seal and bar | Whole bag in chamber |
| Gasket | Check lower; do not remove | Clean, dry or replace | Seals wear; replace | Clean, dry or replace |
| Cool-down | 20 seconds | 2 minutes | 20 seconds | 1 minute |
| Bag type | FoodSaver bags, rolls, containers and accessories only | Silent | Vacuum bags only | Some bags not recommended |
Gaskets are the clearest conflict. NESCO, Weston and Avid Armor treat them as replaceable. The 2022 FoodSaver V4400 manual says not to remove them. Check your own edition before you pull anything.
Check the Different Cooling Times and Bag Restrictions
| Model | Wait between seals | Wait after overheat shutoff |
|---|---|---|
| FoodSaver V4400 | 20 seconds | 20 minutes |
| NESCO VS-12 | 2 minutes (for best seal) | 15 minutes |
| Weston PRO | 20 seconds | About 20 minutes |
| Avid Armor USV20 | 1 minute | Silent |
There is no universal wait time. A 20-second habit from a Weston will short a NESCO by more than a minute and a half.
Source notes: the Weston manual has no troubleshooting table, so its lines come from its service and tips pages. The NESCO guide was read from the maker’s PDF. FoodSaver’s own editions differ: the 2022 maker-hosted V4400 manual says 20 minutes after an overheat shutoff, while an older copy says “several minutes,” and the two also differ on how much bag to leave at the top (3 inches versus 4). Both are shown here as a conflict, not a rule; check your own manual.
None of the four manuals sets a bag width limit. Avid Armor’s table lists a vacuum-time setting for pouches 8 by 12 inches or smaller; that is a setting, not a limit. They limit bag type, not size.
Safety: A Poor Seal Does Not Protect the Meat
A bag that leaks or opens is no longer shielding the meat inside it. The makers’ manuals above cover the seal itself; for storage rules, the extension pages below apply.
SAFETY: University of Maine Cooperative Extension states that vacuum sealing alone is not a method of food preservation and must still be paired with proper shelf, fridge or freezer storage. Clemson Extension says perishable foods must be kept in the refrigerator between 34 and 40 °F, or in the freezer at 0 °F or below.
Clemson adds that disease-producing bacteria may still be present in vacuum-packaged food, so it follows normal cold-storage rules.
For a freezer that holds 0 °F, see SaltRail’s best chest freezer for meat roundup. Storage times and thawing get their own guides on how long vacuum-sealed meat lasts in the freezer and how to thaw vacuum-sealed meat; date packages as in the how to label frozen meat guide.
Vacuum Sealer Not Sealing: Quick Answers
These four questions cover bag width, wait times, gasket replacement and a sealer that will not pull a vacuum.
Does the bag need to be a certain width?
No. None of the four manuals (FoodSaver V4400, NESCO VS-12, Weston PRO, Avid Armor USV20) sets a bag width limit. Avid Armor’s table lists a vacuum-time setting for pouches 8 by 12 inches or smaller; that is a setting, not a limit. What they do limit is bag type: FoodSaver wants FoodSaver bags, rolls, containers and accessories, Weston wants vacuum bags only, and Avid Armor warns some bags are not recommended. Lay the bag flat and straight across the seal bar.
How long should I wait between seals?
Use your own model’s number. FoodSaver V4400 says 20 seconds, NESCO VS-12 says 2 minutes, Weston PRO says 20 seconds, and Avid Armor USV20 says 1 minute. After an overheat shutoff, FoodSaver says 20 minutes, NESCO 15 minutes and Weston about 20 minutes. The cooling table above lays these out side by side.
Can I replace the gasket on my vacuum sealer?
It depends on the model, so check your manual. NESCO VS-12 and Avid Armor USV20 say “Clean and dry or replace,” and Weston says its oval chamber seals may need replacement. The 2022 FoodSaver V4400 manual says “Do not attempt to remove gaskets.”
Why will my sealer not pull a vacuum?
Work through the same four causes the manuals list. Flatten wrinkles in the bag edge. Wipe liquid or crumbs from the seal area. Place the bag end exactly where your manual shows. Then check the gasket for dirt or damage. If all four pass, wait your model’s full cool-down time and try again.
Before your next batch, see how a chamber vacuum sealer compares with an edge sealer if wet cuts keep beating your current machine.